
Anyone who has ever tried to pull an iron-on patch off a favourite jacket knows the sinking feeling that follows. The adhesive holds firm, the fabric starts to pucker, and what should take a few minutes turns into a stressful ordeal. Most of the time, the problem isn’t the patch, it’s not knowing how to remove iron in patches the right way.
In this guide, you’ll learn how to remove iron-on patches safely across different fabrics, handle common problems like stubborn adhesive, and follow a step-by-step method that protects your garment from damage.
Why Removing Iron-On Patches Can Be Tricky
The difficulty comes down to how iron-on patch adhesive works. The backing uses a heat-activated glue that melts into the fabric fibres during application and hardens into a bond as it cools. The deeper the glue penetrates the weave, the harder it becomes to release cleanly.
Delicate fabrics face a different risk entirely. The heat you need to soften the adhesive can warp, shrink, or scorch thin synthetics before the bond fully releases. This is why working slowly with low heat and a protective pressing cloth is non-negotiable regardless of the fabric you are working with.
Residue is the other persistent problem. Even after the patch lifts cleanly, a sticky or stiff patch of glue often remains on the fabric surface and requires a separate cleaning step.
How to Remove Iron-On Patches from Different Items
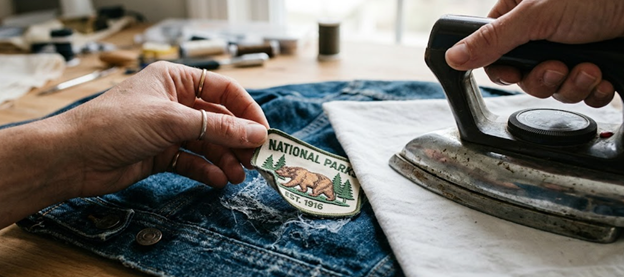
Alt text: remove iron on patch at home
Remove Iron-On Patches From Shirts
- Place a pressing cloth over the patch.
- Set your iron to a medium heat setting (lower for cotton-poly blends).
- Press the iron onto the patch for 15–20 seconds.
- Lift one corner and peel slowly with steady pressure.
- Reapply heat if the patch resists.
- Remove leftover residue using rubbing alcohol and a soft cloth.
- Wash the shirt on a gentle cycle.
Remove Iron-On Patches From Jerseys
- Use a hairdryer instead of an iron.
- Hold it 6–8 cm away from the patch.
- Heat in small circular motions for 30–45 seconds.
- Test the edge gently with your fingernail.
- Peel slowly in small sections.
- Reheat continuously instead of pulling forcefully.
Remove Iron-On Patches From Backpacks
- Use a hairdryer on medium heat (avoid ironing).
- Heat the patch for 45–60 seconds.
- Lift a small edge carefully.
- Peel in very small sections.
- Reapply heat constantly as you go.
- Work slowly to prevent nylon warping or damage.
Remove Iron-On Patches From Caps
- Use a hairdryer for flexible heat control.
- Rotate the cap while heating to distribute heat evenly.
- Heat the patch for about 30 seconds.
- Gently lift one edge.
- Peel slowly in small increments.
- Be extra careful around the brim to avoid warping.
Step-by-Step Guide to Removing Iron-On Patches (Safe Method)
Follow these steps in order every time you remove an iron-on patch, regardless of the fabric type.
Step 1: Apply heat. Set your iron to low or medium, no steam. Place a pressing cloth over the patch and press firmly for 15 to 20 seconds. Alternatively, use a hairdryer on medium heat for 30 to 45 seconds for more delicate fabrics.
Step 2: Lift the edges. Use your fingernail or a pair of flat tweezers to gently lift one corner of the patch. Do not pull yet. Simply test whether the adhesive has softened enough to release.
Step 3: Peel slowly. Hold the fabric flat with one hand and peel the patch back steadily with the other. Keep the angle low and parallel to the fabric surface rather than pulling straight up.
Step 4: Reheat if needed. If you feel resistance at any point, stop peeling immediately and apply heat again. Forcing a cold bond tears fabric every time.
Step 5: Cool and inspect. Once the patch is fully removed, let the fabric cool completely before touching the area. Inspect for adhesive residue and treat it before washing.
Common Mistakes to Avoid When Removing Iron-On Patches
Most patch removal damage comes from a small number of predictable errors. Avoiding these protects your garment every time.
- Overheating the fabric. Applying too much heat softens the adhesive but simultaneously damages the fabric underneath.
- Pulling the patch off quickly. Speed is the enemy of clean removal. Yanking a patch while the adhesive is still partly cold tears fabric fibres and leaves heavy residue embedded in the weave.
- Skipping residue cleaning. Many people remove the patch, see the fabric looks mostly clean, and skip the residue step.
- Using steam. Steam adds moisture to the adhesive, which can spread it further into the fabric weave instead of softening it for removal.
Can You Reuse or Reapply Iron-On Patches?
The short answer is sometimes, but rarely with reliable results. Understanding more about iron on patch adhesives helps you decide whether reuse is actually possible for your specific patch.
The heat-activated glue on the back of an iron-on patch depletes significantly during the first application and further during removal. Once you peel a patch away, the remaining adhesive is uneven, partially spent, and unlikely to bond cleanly to a new surface.
Some patches reapply successfully to smooth, flat cotton surfaces if the original adhesive layer remains mostly intact after removal. Heat the backing briefly to reactivate what remains, position carefully, and press firmly. The bond will be weaker than the original and will not survive repeated washing.
Alternatives to Iron-On Patches
If the adhesive removal process has convinced you that iron-on is not the right choice for your fabric or use case, better options exist. A custom patch with sew-on or Velcro backing works far better on fabrics where adhesive bonds weakly or removal damage is a persistent concern.
| Backing Type | Best For | Durability | Removability |
| Iron-On | Cotton, denim, flat surfaces | Moderate | Possible with heat |
| Sew-On | All fabrics | Excellent | Removable by unpicking stitches |
| Hook-and-Loop (Velcro) | Tactical gear, bags, uniforms | Excellent | Fully removable and reusable |
| Adhesive + Sew | High-wear applications | Maximum | Difficult — permanent |
| Peel-and-Stick | Temporary use only | Low | Easy |
FAQs
Is it hard to remove iron-on patches?
It depends on the fabric and how long the patch has been in place. Iron-on patches on cotton remove relatively easily with heat and patience. On synthetic fabrics like nylon or polyester, the process requires more care and lower heat to avoid fabric damage.
Does removing iron-on patches damage clothes?
Removal done correctly causes minimal fabric damage. The most common causes of fabric damage during removal are excessive heat, pulling the patch off too quickly, and not treating adhesive residue afterward. Following the correct process prevents most of the risk.
Can you remove patches without heat?
You can attempt cold removal by peeling very slowly from one corner, but the success rate is low and the fabric damage risk is high. Heat remains the safest and most effective way to soften the adhesive before removal on almost every fabric type.
Conclusion
Removing iron-on patches cleanly is a skill built on patience, the right temperature, and respect for the fabric underneath. Rush any part of the process and you trade one problem for another. Follow the steps in this guide and you protect your garment, remove the adhesive residue completely
At Eagle Patches Canada, we believe that knowing your patches inside and out, from application to removal, makes you a smarter buyer and a more confident user. Whether you need guidance on patch removal, backing types, or finding the right custom patch for a fabric that has given you trouble before, our team is ready to help.