A hat is basically a billboard you can wear. If you are a business, a team, or a brand in Canada, that billboard is gold. But if your patch starts peeling after two wears, the billboard turns into a “we tried” sign. Not ideal.
This guide on how to iron on patches on hat is built for real-world use, not craft-room perfection. We’ll cover what actually works on different hat materials, what tools you need, how to avoid common mistakes, and when you should switch to a different method for long-term durability.
If you want the full overview of iron-on patch basics before you do hats specifically, this guide “Complete Guide to Iron-On Custom Patches in Canada” pairs perfectly with this post.
Why Hats Are a Smart Place for Iron On Patches
Hats are one of the easiest brand assets to distribute. Teams wear them. Staff wear them. Customers buy them. And they show up everywhere.
Businesses use iron-on hat patches for:
- Staff uniforms for retail, cafes, events, and delivery teams
- Branded giveaways and promo kits
- Sports teams and clubs that want consistent headwear
- Merch drops for creators and local brands
- Corporate events and trade shows
For sports, it’s even bigger. Hats are worn at games, practices, travel days, and tournaments. When your patch stays put, your brand stays seen.
Before You Start, Know the Hat Material
This is where most people mess up. Different hats need different heat and handling.
Cotton and canvas hats
These are the most iron-friendly. They can take heat well and bond nicely.
Polyester hats
Common in sports hats. Polyester can handle heat but can also melt or shine if the iron is too hot or pressed too long.
Wool blend hats
Wool can scorch if overheated. Use a pressing cloth and moderate heat.
Mesh trucker hats
The front panel is usually okay, but the mesh is a no-go for direct heat. You need to control where the heat goes.
Structured hats
The stiff front panel and seams can make it tricky. A curved surface also means uneven pressure, which is the main reason iron-on hat patches peel.
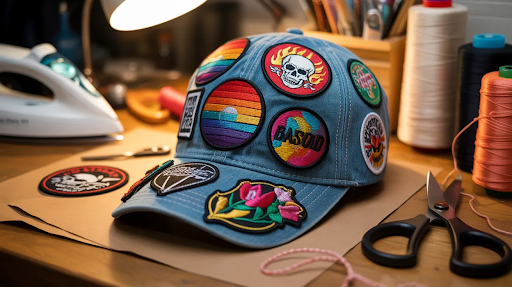
What You Need to Iron On a Patch on a Hat
Keep it simple. You do not need fancy tools, but you do need the right ones.
- Iron with no steam, or heat press if you have it
- Thin cotton pressing cloth or parchment paper
- Heat-resistant tape or clips to hold the patch in place
- A firm surface and something to fill the hat shape
- Your patch with iron-on backing
For businesses doing multiple hats, a small heat press is a game changer for consistency. But an iron can still work if you follow the steps properly.
Step by Step How to Iron On Patches on Hat
Step 1: Clean and prep the hat
Wipe the area where the patch will go. Oils and lint reduce adhesion. If it is new, you are usually fine. If it has been worn, a quick clean helps.
Step 2: Choose the placement
Most patches go on the front panel, side panel, or above the strap area. Avoid seams, thick stitching lines, and areas that curve too sharply.
Pro tip for brands: Keep placement consistent across staff and team hats. Uniformity looks more professional than random placement.
Step 3: Preheat the hat area
Place the hat on a firm surface. Stuff it with a towel so the panel is flat. Preheat the area with the iron for 8 to 12 seconds. This warms the fabric and helps the adhesive grip.
Step 4: Position the patch
Place your patch exactly where you want it. Use heat-resistant tape if needed. Hats move easily, so this helps prevent crooked patches.
Step 5: Cover with a pressing cloth
Always use a pressing cloth or parchment. This prevents scorching and protects stitching, especially on embroidered patches.
Step 6: Press with firm pressure
Set the iron to a heat level that matches the fabric:
- Cotton: medium-high
- Polyester: medium
- Wool blends: medium-low
Press down firmly for 15 to 25 seconds. Do not slide the iron around. Sliding can shift the patch and distort the adhesive.
Step 7: Let it cool completely
This is not optional. The adhesive sets as it cools. Let the hat sit for a few minutes before touching the patch edges.
Step 8: Check the edges
If an edge lifts slightly, repeat the press for 10 to 15 seconds with the cloth on top. If it still lifts, you may need a different method like stitching.
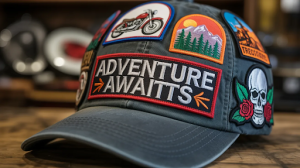
Which Patch Styles Work Best on Hats
Not all patch styles behave the same under heat and curve.
Embroidered iron-on hat patches
Embroidered patches look classic and premium. They are perfect for logos and bold designs. They also have thickness, which means you must press firmly so the adhesive bonds through the thread density.
Woven iron-on hat patches
Woven patches are smoother and bond well. Great for detailed logos and clean text.
Sublimated iron-on hat patches
Sublimated patches can look great for full colour graphics. Bonding is usually fine, but the final durability depends on the hat fabric and curve.
Chenille and applique patches on hats
These can work, especially on flatter front panels. They are thicker, so pressure and time must be consistent.
PVC patches on hats
PVC is usually not ideal for iron-on application. Many PVC patches use different attachment methods. If you want PVC on hats, it is often better to use stitching or other backing.
Leather patches on hats
Leather patches are popular for caps and toques. They can be heat applied in some cases, but leather can react to heat. A press cloth and correct temperature are critical.
3D embroidery patches
Raised styles can look fantastic on hats, but they need stable placement and consistent pressure. Heat press is recommended for batches.
Sports and Business Uses Where This Matters Most
If you are running team or staff headwear, durability matters because hats get used hard.
Sports programs use hat patches for:
- Hockey and soccer travel hats
- Baseball and softball team caps
- Football and lacrosse sideline hats
- Ski and snowboard team gear
- Gym and martial arts club merch
- Tournament and championship hats
Businesses use them for:
- Brand merch for retail stores and local creators
- Event staff and promo teams
- Trades crews and onsite service teams
- Corporate gifts and seasonal campaigns
If you are building a merch plan, this guide “Where Can I Get Custom Patches Made in Canada?” also helps to know where to source patches reliably in Canada.
Common Mistakes That Make Iron On Hat Patches Fail
Too much curve
If the panel is curved, the patch edges do not get even pressure. Flatten the panel with a towel insert.
Using steam
Steam can weaken adhesive. Use dry heat only.
Sliding the iron
Press, do not drag. Dragging shifts the patch and creates weak spots.
Not letting it cool
Touching it too early is a classic mistake. Cooling is part of the bonding.
Wrong heat setting
Too hot can damage hats. Too low fails adhesion. Match the fabric and test carefully.
When You Should Stitch Instead of Iron On
If the hat will be washed often, worn daily, or used in wet conditions, consider reinforcing with a stitch. Many brands do a hybrid approach: iron-on for placement and bonding, then a clean stitch around the edge for long-term hold.
This is especially smart for team caps that see tournament travel, rain, and constant wear.
FAQs
Can I iron on patches on any hat?
Most cotton and polyester hats work well. Mesh trucker hats and highly structured hats are trickier and may need a press or stitching.
Why is my iron-on hat patch peeling at the edges?
Usually uneven pressure from a curved panel or not enough heat time. Flatten the panel, use firm pressure, and let it cool fully.
Is it better to use a heat press for hats?
For businesses and teams doing multiple hats, yes. A heat press gives consistent pressure and alignment.
Can embroidered patches be ironed onto hats?
Yes. Embroidered patches are popular on hats. They may need a longer press time and firm pressure because they are thicker.
How long should I wait before wearing the hat?
Give it at least a few minutes to cool completely. For best bond, waiting a few hours before heavy use is a good idea.
Make the Patch Stay, So the Brand Stays!
Learning how to iron on patches on hat is not about crafting perfection. It is about getting a clean, durable result that holds up through real life in Canada, from windy sidelines to busy retail floors.
If you want iron-on hat patches that look sharp and bond properly, Eagle Patches CA can help you choose the right patch type and backing for your hat material and use case. Share your logo, tell us what hats you are using, and we’ll guide you to a patch setup that stays put and keeps your brand looking professional.