
A patch can be perfectly made and still look off if it’s placed wrong. Too high and it feels awkward. Too low and it disappears. Put it over a seam and it starts lifting. Patch design matters, but patch placement is what makes the whole thing look intentional.
This guide breaks down the best patch placement spots for the most common garments and gear in Canada, plus quick sizing tips so your custom patches look clean on uniforms, merch, outerwear, and bags.
All About Patch Placement
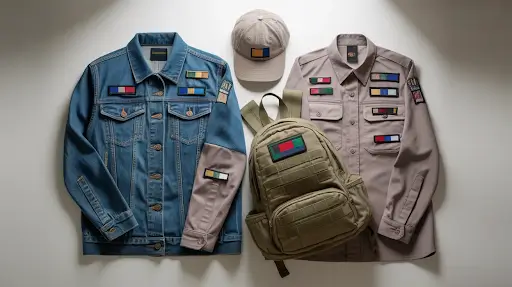
The best patch placement depends on the item and purpose. For uniforms, use left chest for names and logos and sleeves for departments. For jackets, use upper sleeves or chest for visibility and back panels for statement patches. For hats, place patches centred on the front panel. Avoid seams, high-friction areas, and curved spots that prevent flat bonding.
If you want help choosing patch materials before placement, this guide covers every patch type in one place: Canada’s Go-To-Guide to Every Custom Patch Type You Can Get.
Placement Rules That Always Work
Before we get into specific garments, these rules save most patch disasters.
Avoid seams and thick stitching lines
Seams create bumps. Bumps ruin clean edges and can cause lifting, especially for iron-on backing.
Place patches where they are visible
If your patch is for branding, put it where people naturally look: chest, sleeve, front of cap, upper back.
Watch friction zones
Backpack straps, seatbelts, and bag handles rub constantly. If a patch sits under friction, it will wear faster.
Match patch size to the surface area
A huge patch on a small cap looks silly. A tiny patch on a wide jacket back looks lost. Balance matters.
Patch Placement on Uniforms and Workwear
Uniforms are the most common use for custom uniform patches, and placement is usually about clarity.
Left chest placement
Best for: logo patches and custom name patches
Why it works: it’s readable in conversation and looks professional.
Recommended size: 3 to 4 inches wide for logos, smaller for names depending on format.
Right chest placement
Best for: secondary branding, roles, or team identifiers
This is a good spot when the left chest is reserved for names or primary logo.
Sleeve and shoulder patches
Best for: departments, flags, unit identifiers, or organization crests
Sleeves are high visibility from the side and look official on workwear.
Back yoke placement
Best for: “STAFF,” “SECURITY,” “CREW,” or company name
This works well for events and public-facing uniforms where quick identification matters.
Patch Placement on Jackets and Outerwear
Jackets give you more real estate, but placement should still feel balanced.
Upper sleeve placement
Best for: embroidered patches, woven patches, and PVC patches
Why it works: visible, clean, and not usually blocked by zippers or pockets.
Chest placement on jackets
Best for: brand logo patches, small badges, and mini patches
Keep it away from pocket openings and zipper lines.
Back panel placement
Best for: large statement patches, club back patches, tour style designs
If you’re doing a large patch, centre it and keep spacing consistent from the collar.
Patch Placement on Hoodies and Sweatshirts
Hoodies are a popular merch, so patch placement should feel modern and wearable.
Left chest mini patch placement
Best for: subtle branding and premium merch feel
Mini patches look clean here, especially embroidered or woven.
Sleeve placement on hoodies
Best for: slogans, icons, and team identifiers
Sleeves feel stylish without being too loud.
Pocket corner placement
Best for: small badge patches
A patch on the upper corner of the kangaroo pocket looks intentional and trendy.
Patch Placement on Hats and Caps
Caps are curved, so placement must consider the panel shape.
Front centre placement
Best for: primary logo patches
This is the classic spot. Keep the patch centred and sized to the front panel.
Side panel placement
Best for: secondary logos, short text, or small icons
This works well for subtle branding and merch drops.
Tip: embroidered and leather patches look especially clean on hats. Woven works well for small text.
Patch Placement on Bags and Backpacks
Bags are functional, which means they get rubbed, tossed, and dragged around.
Front pocket placement
Best for: brand marks and event patches
Most visible, easiest to keep flat.
Top flap placement
Best for: outdoor bags and tactical style packs
Works well with hook and loop backing for swappable patches.
Avoid strap placement
Straps are friction zones. If you want branding on straps, consider woven labels instead of thick patches.
Quick Placement Check
| Item | Best patch placement | What to avoid |
| Uniform shirt | Left chest, sleeves | Seams, pocket openings |
| Work jacket | Upper sleeve, chest | Zippers, strap friction |
| Hoodie | Left chest, sleeve | Pocket edge friction |
| Cap | Front centre, side panel | Curved seams and mesh areas |
| Backpack | Front pocket, top flap | Straps and high rub zones |
If you’re still comparing suppliers and want to order smoothly in Canada, this guide helps: Where Can I Get Custom Patches Made in Canada?
FAQs
Where should I place a patch on a uniform?
Left chest for logos and name patches, sleeves for department or unit patches, and back yoke for staff identifiers.
What is the best patch placement for hats?
Front centre is most common. Side panel placement works well for small icons or secondary logos.
Can I iron-on a patch over a seam?
It’s not recommended. Seams prevent even bonding and often cause edge lifting. Sew-on is better if seam placement is unavoidable.
How do I choose the right patch size for placement?
Match the patch to the surface area and viewing distance. Larger areas like jacket backs can handle bigger patches, while caps need compact sizes.
Do PVC patches need different placement than embroidered patches?
PVC patches are slightly thicker, so place them on flatter areas for best comfort and durability.
Place It Like You Meant It!
Great patch placement is what makes a patch look premium, professional, and wearable. Pick high-visibility spots, avoid seams and friction zones, and size your patch to the garment.
If you want help choosing the best patch type and placement for your uniforms, merch, or gear, Eagle Patches CA can guide you from design to proof to final production. Share what you’re patching and where it will go, and we’ll recommend a setup that looks right and lasts.