
Ordering patches should feel like ordering coffee. You pick what you want, you confirm the details, and you get something you’re happy to show off. But a lot of brands and businesses end up stuck in patch limbo because they don’t know what files to send, what size to choose, or why “backing” suddenly sounds like a science project.
This guide breaks down how to order custom patches in Canada without the back-and-forth, the confusion, or the “wait, why does it look different than our logo” surprise.
If you want the full patch basics first, keep this open in another tab for your assistance: A Complete Canadian Guide to Custom Patches (2026 Update)!
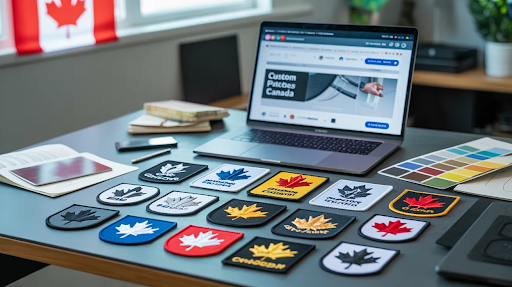
How to Order Custom Patches in Canada
To order custom patches in Canada, you need five things: your artwork, patch size, quantity, patch style, and backing type. Most orders follow a simple flow: request a quote, approve a digital proof, then production and Canada-wide delivery.
Step 1: Decide What the Patch Is For
This is the fastest way to avoid ordering the wrong thing.
Ask yourself:
- Is this for custom uniform patches or merch
- Will it be used outdoors or on heavy workwear
- Does it need small text and fine detail
- Will it be washed often
- Does it need to be removable
A patch for a mechanic shop shirt is different from a patch for a hockey travel jacket. Same concept, different build.
Step 2: Choose the Right Patch Style
These are the most common custom patch styles Canadian businesses order.
Embroidered patches
Best for classic logos, uniforms, and a premium stitched look.
Custom woven patches
Best for small text and detailed designs that need crisp readability.
Custom PVC patches
Best for tough use, outdoor gear, and patches that need weather resistance.
Custom chenille patches
Best for varsity style letters, school teams, and bold statement patches.
Custom sublimated patches
Best for full colour designs, gradients, and modern graphics.
Custom leather patches
Best for caps, toques, aprons, and premium retail branding with a clean, subtle look.
If you want a deeper breakdown of each option, this post “Where Can I Get Custom Patches Made in Canada?” covers it in one place!
Step 3: Pick the Right Backing
Backing is how the patch attaches. This choice affects durability and convenience more than people expect.
- Sew-on for long-term wear and frequent washing
- Iron on patch backing for quick application on lighter use items
- Hook and loop when you need removable patches, common for tactical gear and role-based teams
If your patch is going on hats, beanies, or curved surfaces, sew-on is usually the most reliable.
Step 4: Get Sizing Right the First Time
Patch size is where many orders go sideways. A patch that is too small loses detail. A patch that is too big looks awkward.
Quick sizing tips:
- Chest patches often sit around 3 to 4 inches wide
- Sleeve patches are typically smaller and taller
- Hat patches usually work best in compact widths
- If your logo has small text, go slightly larger or choose woven
If you are unsure, share where it will be placed, and a good supplier will recommend sizing that looks balanced.
Step 5: Send Artwork That Makes Production Easy
You do not need perfect files, but better input equals better output.
Best files to send:
- Vector formats like AI, EPS, or PDF
- High resolution PNG with a transparent background
- Clear notes on colours and any text that must stay readable
If you only have a low quality logo, most patch makers can help refine it before production. The key is to approve the proof carefully before anything is made.
Step 6: Approve the Proof Like You Mean It
The proof is your last “save” button. Look at:
- Spelling and text spacing
- Colours and contrast
- Size, shape, and border style
- Backing choice and placement notes
- Any small detail that might get lost
If you want custom patches that look consistent across reorders, the proof is the standard you lock in.
Step 7: Order Quantities the Smart Way
Businesses and teams almost always need more than the exact number they think.
Order extras for:
- New hires or new team members
- Replacements and backups
- Future events and giveaways
- Quick reorders without delays
Even a small buffer saves stress, especially during peak seasons.
The Simple Canada-Friendly Ordering Checklist
Use this and you’ll avoid 90 percent of patch ordering problems.
- Patch use case confirmed
- Patch style selected
- Backing selected
- Size and placement confirmed
- Quantity plus extras confirmed
- Artwork sent with colour notes
- Proof approved carefully
- Delivery deadline shared up front
FAQs
How to order custom patches if I only have a rough idea?
Send your concept, even if it is a sketch or reference. A good supplier will help refine the design and recommend the best patch style and size.
What is the best patch style for uniforms in Canada?
Embroidered patches are the most common for uniforms. For small text, woven patches often look cleaner.
Are iron on patches good for business use?
They are great for quick application and lighter use. For heavy workwear and frequent washing, sew-on is usually the safer long-term choice.
How long does it take to order custom patches in Canada?
It depends on patch type, quantity, and how quickly the proof is approved. Most delays happen during proof approval, not production.
Can I reorder later and keep the same look?
Yes, if the proof and production setup are saved. That’s how brands keep consistency across seasons and new team members.
Ordering Patches Should Be Easy Peasy!
Now you know how to order custom patches in Canada without the guesswork. Choose the right style, pick a backing that fits real use, approve the proof carefully, and order smart quantities.
If you want a smooth process and patches that come out clean, consistent, and ready for real-world wear, Eagle Patches CA can help from design to delivery. Send your artwork, tell us where the patch is going, and we’ll get you a proof that you can approve with confidence.